

TDS Mug Project
Welcome to classroom 144, the Art Room. In here, there’s much more being created than just the art. LeJean Easley, JCFS TDS Art Teacher for more than 15 years, has been foundational to the success of this program. Every year, students are provided a diverse art curriculum that ranges from glass fusing, sand sketching, sewing, still life drawing and so much more. Students regularly look forward to their art class where they are encouraged to journey out of their comfort zones. LeJean shared that initially students may be guarded to the artistic process and unwilling to engage. But, with encouragement, flexibility, and a bit of humor, she finds that all students realize the artistic process is not only fun, but something they can do well!
In November, students began their pottery wheel unit. Students are always given an option to make a cup, plate or bowl. If students prefer to sculpt, they are given the option to hand-make a creation at their seat. LeJean happened to receive a special request for 100 hand-made student mugs. She offered her students the opportunity to help fulfill the order. Students were told they would earn small profit for their work should they be interested in participating and they were!
Did you ever wonder what it takes to turn a block of clay into a beautifully finished mug?
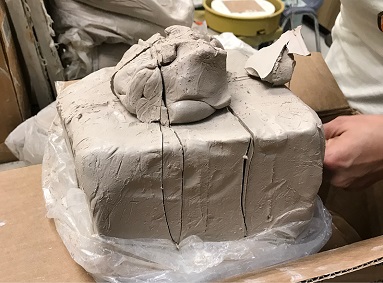 |
THE BEGINNING |
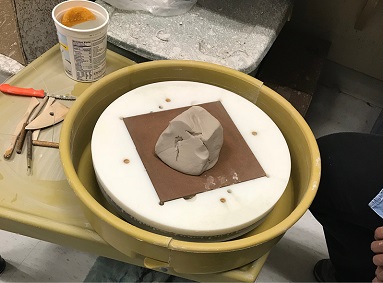 |
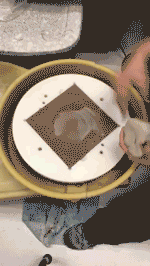
WHEEL TIME |
SCULPTING THE CUP (Above)
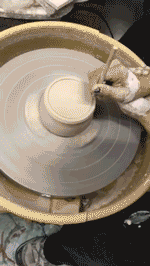
Once it’s clear the clay is stabilized and centered, the building begins. The wheel slows down to a medium speed for increased control because too fast of a speed would cause a loss of control and the clay to go off-center. The next step is creating the mug. One finger is inserted ¾ of the way down into the middle of the cylinder-disk shaped clay. Then, the finger is removed, water is squeezed into the hole, and the step is repeated this time with the other hand added on the outside to facilitate the shaping of the walls.
A palm pushes against the outside wall and the finger pushes from the inside which helps to create a wider opening. The next step is to thin the walls and build height. Continuing with the same movement using two hands and a sweeping motion, both hand and finger should mirror each other from the bottom to the top, making sure the clay is supported on the inside and the outside. Any excess water from the inside of the cup needs to be removed to avoid cracking. A dry sponge is inserted into the sculptured cup to soak up water and then rung out. The sculpting portion for this design stage has been completed.
Once the water is completely soaked up, the wheel is set to a slower speed and the sculpture is cut from the wheel with a clay cutting tool. Once cut, it remains attached to the bat for the first drying stage. Because the cup is soft and needs to be dried, it is placed in a cleaner bag, which LeJean calls a “Magic bag” for clay. The mug stays there for a week to slowly dry until the desired level of dryness is reached. Now, it’s ready for the finishing details like attaching the handle and the foot.
SECOND STAGE OF WHEEL TIME (Above)
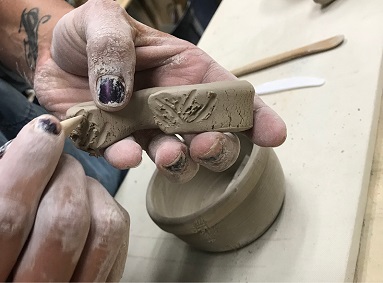
To make the foot (a term used to describe the bottom rim of the cup), the cup is put back on the wheel, centered upside down this time with no bat attachment. This is the opposite of the other centering process and is done a great deal slower. LeJean takes three lugs of clay to lock the upside-down cup into place. Due to the need for a fast wheel speed during this step, there’s a good likelihood for the cup to spin off without added support. While in motion, the “Pokey Tool” a sharp tool is used to mark two circles in the bottom of the cup, creating the foot. Then, the “loop tool” officially known as the Kemper Tool is used to carve away the bottom of the clay to create the foot- the clay goes flying off but it’s okay. It’s not always clear when this step is finished, so it takes a bit of patience and trial and error to know when it’s done. The hope is always that the foot process did not break through the bottom of the cup. Once that part is done, the handle is ready to be attached.
 |
HOW TO MAKE THE HANDLE |
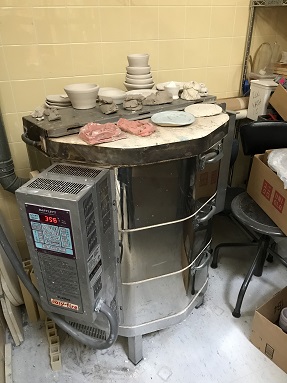 |
TIME TO COOK
|
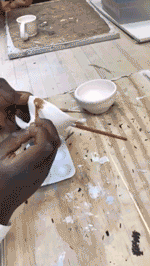
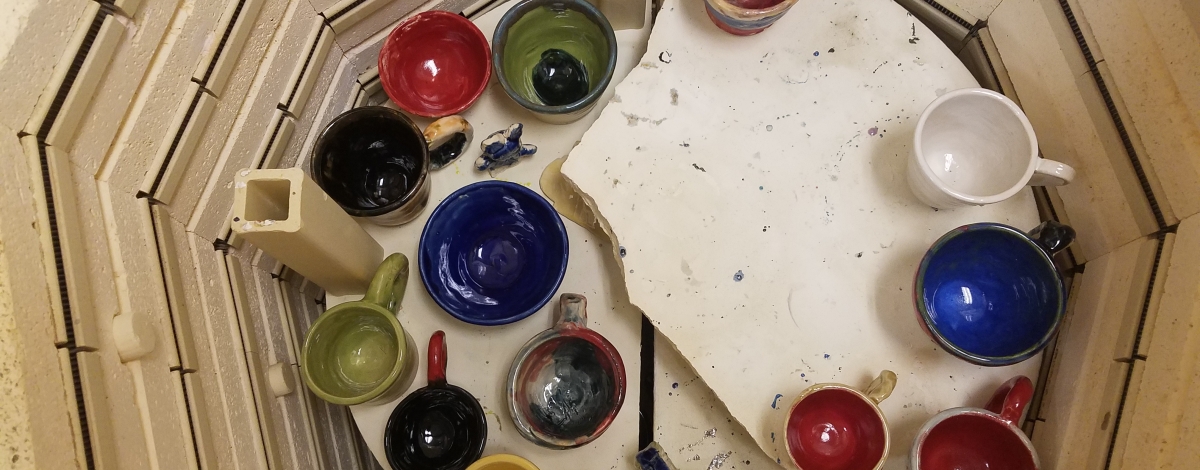
GLAZE TIME (Above)
When the kiln has reached a normal temperature, the unglazed clay now called bisqueware, is ready to be glazed. The students pick their glaze colors, and ideally paint two or more coats to ensure a nice finished color. Because the cooking process can cause the glaze to come out slightly different than expected, there is a level of trust and flexibility required by the student. The bottom foot is not painted to ensure the piece can be easily removed from the kiln once done cooking. The piece is then fired again but for a shorter time of 9 hours due to not needing a drying time. Once dry, the piece can be removed, and the product is finished!
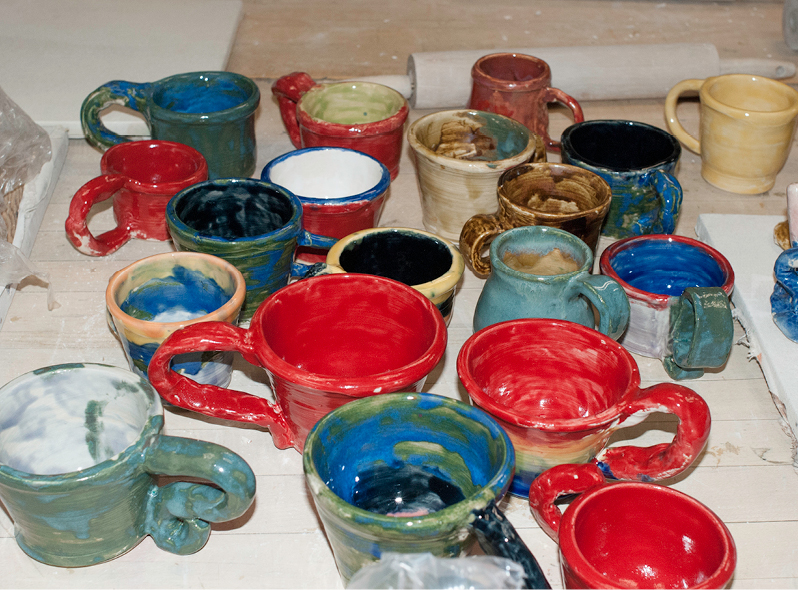
Finished mugs ready to be sold! Check back to read more stories about what TDS students are creating LeJean’s Art Room!